WW1 Locations
On Google Maps special maps are placed containing information on all kinds of subjects. I have placed a map of the WW1 places around Ypres in Belgium. This map WW1 - Ypres can be found in 2 ways. The first method describes a general method of accessing maps:
- Method 1
- Goto GoogleMap http://maps.google.com.
- Click on Show search options
- Open Combo-box All results and choose for Related Maps .
- Type WW1 - Ypres and click on the Search Maps button
- Method 2
- Simply click on WW1 - Ypres which will link to the map.
Passendale
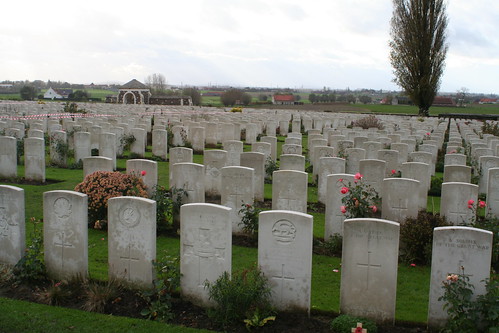
| The Battle of Passendale or Ypres III is one of the saddest battles in History. Massive loss of lives without gaining success.
 “I died in hell – (They called it Passchendaele)”
 - Line from Memorial Tablet, poem by Lieutenant Siegfried Sassoon, Royal Welch Fusiliers, November 1918
|
Loading map...
|
Battle of Messines Ridge
|
Krater 11 Spanbroekmolen. Pool of peace.
Spanbroekmolenkrater (Pool of Peace)
The Spanbroekmolenkrater is the most famous cater of the Mijnenslag. De tunnel (521 meter) has been digged by the 171 Tunneling Company in 1916. The Germans discovered the digging 3 moth before the planned detonation and destroyed it with a grenate/bomb.
The British digged a new entrance to the munition room and restored the wiring. The job has been finished 1 day before the actual explosion.
|
Loading map...
|
The following is taken from the Hellfire Corner website: [1]
This mine crater sits on the top of a small rise a couple of kilometres outside the village of Wijtschaete ("Whitesheet" to the troops). It was one of the craters blown at the beginning of the Battle of Messines, at 3.20 a.m.on 7th June, 1917. The mine was one of 19 detonated simultaneously along the Messines Ridge, each under a significant German strongpoint.
The battle of Messines, the planning for which was entrusted to General Plumer, was a resounding success. Plumer went to great pains to ensure that everyone knew his part in the coming battle. In this he diverted from the plan which had been used on the Somme the previous year, when only the officers knew the specific details. When the officers (expected to lead from the front and wearing conspicuously different uniform from the men) were picked off first, the men following them were at a loss as to what to do next. This would not happen at Messines. In addition, Plumer made his plans with a clear objective - to capture and hold the ridge - that was all. There was no place in Plumer's carefully-laid plans for any unprepared, opportunist (and possibly costly) follow-up. The attack was not designed to herald a breakthrough. "Bite and Hold" was a phrase used at the time, and the nineteen mines were to be the first and most savaging bites of all.
The mining operations had not gone unnoticed. The Germans knew that the Allies were digging. They had mine galleries of their own. Undergound, in fact, there was warfare of a kind just as sinister as on the surface. The miners dug not only their main galleries to the chambers where they laid their charges, but also shallower, defensive galleries, which they could use to protect their mines. There was much exploratory digging, and listening in silent, dark, cramped tunnel-heads, trying to determine if the other side were digging and, if so, how quicky and in which direction. The most nerve-wracking moment was when the enemy digging stopped, as this might mean that a small destructive charge had been placed, not intended to break the surface, but to crush the galleries below and entomb the men working there. The miners used small, portable charges called Camouflets for this purpose. Even when the miners had finished their work, and their mine had been successfully laid - 60 tons of explosive material in the case of Spanbroekmolen - and the electric wires for firing were in place and the tunnel blocked by several walls of sandbags with air-spaces between them, their job was not over. They still had to protect their work until it was needed, to listen for the sounds of exploratory digging from the other side and take action to counter this threat. On more than one occasion Allied and German tunnels met undergound, and there was furious hand-to-hand fighting in the total darkness of the cramped galleries. The Spanbroekmolen mine fell victim to this insidious counter-mining when, few weeks before the planned firing of the mines, the Germans fired an underground charge which blew in several hundred feet of the main Spanbroekmolen tunnel. As the tunnellers, wearing breathing apparatus, inspected the damage, they saw to their dismay that the firing-wires had been broken and that the neat, boarded tunnel had been reduced to a broken shambles. It was obvious that the tunnel could never be re-opened. The only option was to dig another gallery, by-passing the damaged section, so that the firing circuits could be re-connected. The officers who would have the job of firing the mine spent the last few hours testing and re-testing the circuits with a torch battery, its feeble charge being strong enough to give a reading, but not enough to fire the detonators.
Some of the other mines to be used in the attack had been lying underground for almost a year, with some doubts as to the condition of the explosive charges. The repairs at Spanbroekmolen were completed with, literally, only hours to spare, with a very makeshift detonation system. At all the mined positions, there were no guarantees that the mines would explode as required. In fact, the soldiers waiting in the trenches at the foot of the ridge had been warned that they could not depend absolutely on the mines working as planned, and their orders were to leave their trenches and attack whenther the mines went up or not. In fact, the Spanbroekmolen mine was fifteen seconds late, by which time the men of the 36th (Ulster) Division had already left their trenches and begun to race across No-Man's Land and some of them were killed by falling debris. They are buried in Lone Tree cemetery nearby.
Overview_Messines_Ridge
The map below shows all craters of the Messines Ridge Battle. Information on the place can be found by clicking on a marker. The most northern marker is Bayernwald. The Craters are more to the South. The names are (in Dutch/Flemish):
| Crater Name | Crater Name | Crater Name | Crater Name |
|---|---|---|---|
| Krater 4 - Hollandsche Schuur nr. 1 | Krater 7 - Petit Bois 2 | Krater 10 - Peckham | Krater 14 - Kruisstraat nr. 2 |
| Krater 5 - Hollandsche Schuur nr. 2 | Krater 8 - Petit Bois 1 | Krater 11 - Krater Pool of Peace | Krater 15 - Kruisstraat nr. 3 |
| Krater 6 - Hollandsche Schuur nr. 3 | Krater 9 - Maedelstede Farm | Krater 12 - Kruisstraat nrs. 1 en 4 | Messines Ridge British Cemetery |
The map contains information based on a KML [2] file which can be downloaded and used in Google Earth [3].
<googlemap lat="50.7865" lon="2.880189" zoom="14" controls="small" width="950" height="900">
http://www.harmfrielink.nl/KML/Mesen.kml
</googlemap>
See also
- PhotoStream Tyne Cot on Flickr, WW1 photos made by Harm Frielink.
- Overview of Ypres
References
- ↑ Hellfire Corner Website, Tom Morgan's website.
- ↑ Google KML API, Google documentation on KML Files
- ↑ Google Earth