Eclipse Android Development Environment: Difference between revisions
| Line 29: | Line 29: | ||
After registration and activating your account the software wil be automatically downloaded. | After registration and activating your account the software wil be automatically downloaded. | ||
For Mac OS/X this will be a installtion package (dmg file). | For Mac OS/X this will be a installtion package (dmg file). | ||
=== Oracle VM VirtualBox === | |||
Genymotion operation relies on the use of Oracle VM VirtualBox in the background. | |||
<br>This enables virtualizing Android operating systems. | |||
<br>If you do not already have Oracle VM VirtualBox installed on your computer, you will be asked to do so prior to installing Genymotion. | |||
=== Eclipse === | === Eclipse === | ||
Revision as of 12:34, 14 January 2015
Installing and using the ADT plugin in Eclipse [1] [2].
Download the ADT Plugin

To add the ADT plugin to Eclipse:
- Start Eclipse, then select Help > Install New Software.
- Click Add, in the top-right corner.
- In the Add Repository dialog that appears, enter "ADT Plugin" for the Name and the following URL for the Location:
https://dl-ssl.google.com/android/eclipse/
Note: The Android Developer Tools update site requires a secure connection. Make sure the update site URL you enter starts with HTTPS. - Click OK.
- In the Available Software dialog, select the checkbox next to Developer Tools and click Next.
- In the next window, you'll see a list of the tools to be downloaded. Click Next.
- Read and accept the license agreements, then click Finish.
- If you get a security warning saying that the authenticity or validity of the software can't be established, click OK.
- When the installation completes, restart Eclipse.
Configure the ADT Plugin
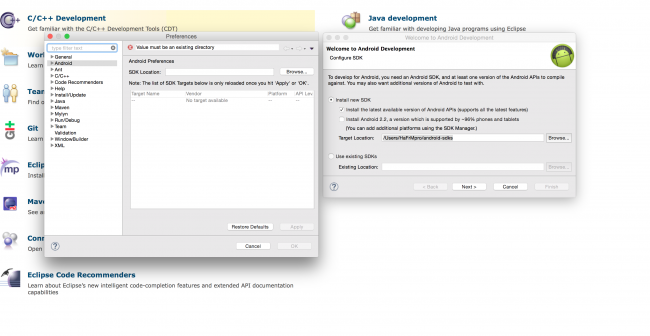
Once Eclipse restarts, you must specify the location of your Android SDK directory:
- In the "Welcome to Android Development" window that appears, select Use existing SDKs.
- Browse and select the location of the Android SDK directory you recently downloaded and unpacked.
- Click Next.
Your Eclipse IDE is now set up to develop Android apps, but you need to add the latest SDK platform tools and an Android platform to your environment. To get these packages for your SDK, continue to Adding Platforms and Packages.
Install Genymotion
First install Genymotion. To be able to download the software you have to be registered. After registration and activating your account the software wil be automatically downloaded. For Mac OS/X this will be a installtion package (dmg file).
Oracle VM VirtualBox
Genymotion operation relies on the use of Oracle VM VirtualBox in the background.
This enables virtualizing Android operating systems.
If you do not already have Oracle VM VirtualBox installed on your computer, you will be asked to do so prior to installing Genymotion.
Eclipse
To install Genymotion plugin for Eclipse:
- In Eclipse, go to Help > Install new software and click Add.
- Fill in the fields with Genymotion name and https://plugins.genymotion.com/eclipse/ location.
- Under Genymobile, check Genymotion and Genymotion Eclipse Tools and follow the steps indicated by Eclipse.
See also
Reference
- ↑ Android Developer, Installing the Android Developer Tool (ADT).
- ↑ Genymotion, Android emulation.